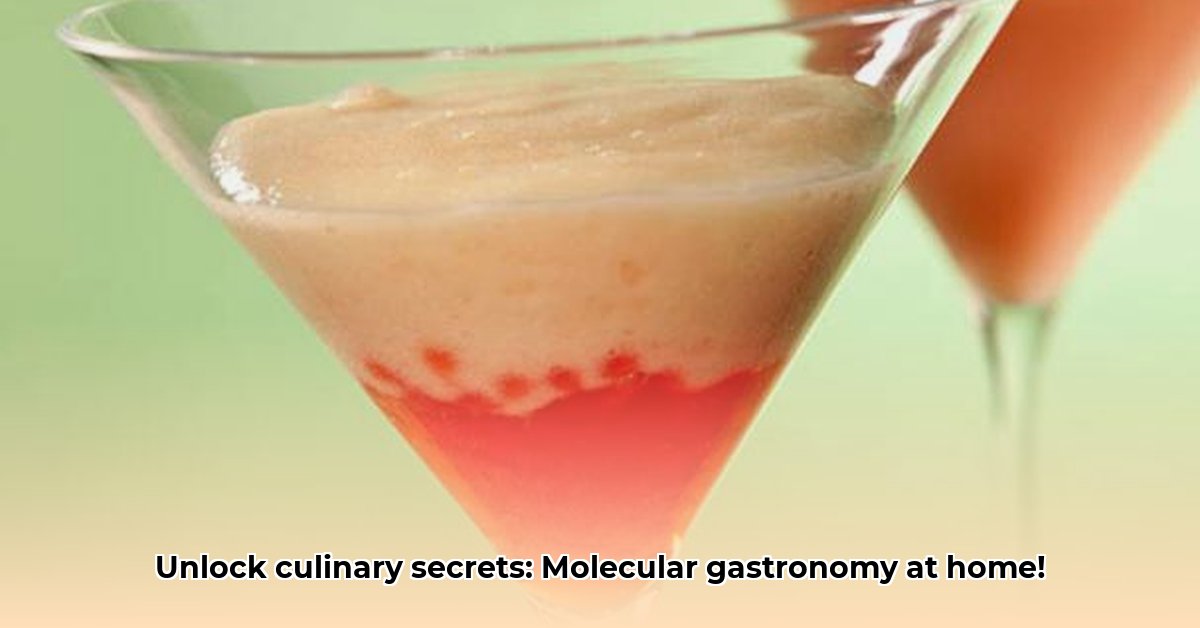
Want to elevate your home cooking with innovative techniques? Get ready to explore the fascinating world of molecular gastronomy. It’s more accessible than you might think, allowing you to craft culinary creations like perfectly round spheres of flavor, airy foams, and delightful jellies—all from readily available ingredients. This guide will demystify the basics, share simple recipes, and offer troubleshooting tips to transform your kitchen into a science-powered culinary playground. For deeper flavor understanding, learn about the science of Umami.
Molecular Gastronomy: The Science That Turns Your Kitchen into a Lab
The term “molecular gastronomy” can seem daunting, conjuring lab-like imagery rather than a home kitchen. However, this culinary approach is surprisingly accessible. It’s essentially using scientific principles to transform simple ingredients into extraordinary dishes, like silky-smooth sauces, magically jiggly jellies, and edible bubbles. This guide will show you how to bring the wonders of this technique into your kitchen, with no lab coat required.
Molecular gastronomy, at its heart, is about understanding the “why” behind cooking. It delves into the physical and chemical transformations that occur when we prepare food. Why does a soufflé rise? How does a sauce emulsify? By understanding these principles, we can manipulate ingredients to create novel textures, flavors, and presentations. Hervé This, a French physical chemist, is considered one of the pioneers of molecular gastronomy, emphasizing its focus on the science of culinary processes. Nicolas Kurti, a physicist, collaborated with This, solidifying the field’s scientific foundation.
Essential Tools and Ingredients: Your Molecular Gastronomy Starter Kit
Before we dive into transforming foods, let’s gather the essentials. Forget expensive lab equipment; a few key tools and easily found ingredients will get you started, boosting your culinary arsenal with science:
- Immersion Blender: Your new best friend for creating incredibly smooth textures, essential for airy foams. Look for one with variable speed settings for optimal control.
- Digital Kitchen Scale: Precise measurements are crucial. Aim for accuracy to at least one gram for consistent results. A scale with a tare function is also very helpful.
- Measuring Spoons and Cups: While your scale is primary, these remain useful for quickly measuring liquids and smaller quantities.
- Saucepans and Bowls: Standard kitchen essentials; have a few sizes on hand. Stainless steel is durable and easy to clean.
- Syringes (optional): Helpful for creating even-sized spherified droplets, but a small spoon works for beginners. Look for food-grade syringes.
- Sieve or Fine-Mesh Strainer: to remove any small bits of undissolved ingredients
Now, for the magic ingredients:
- Agar-Agar: Derived from seaweed, this natural gelling agent is your go-to for jellies and gummies. Find it at Asian markets, health food stores, or larger supermarkets. It’s a vegetarian alternative to gelatin.
- Sodium Alginate: Another seaweed extract, essential for spherification—creating caviar-like spheres. Available online or in specialized kitchen stores. Be sure to store it in an airtight container to prevent clumping.
- Calcium Chloride: Works with sodium alginate in spherification. Inexpensive and readily available online. Food-grade calcium chloride is important.
- Lecithin: A natural emulsifier that helps blend oil and water, resulting in stable foams and emulsions. Found in health food stores and some supermarkets. Soy lecithin is a common and effective option.
- Xanthan Gum: A thickening and stabilizing agent often used in gluten-free baking, xanthan gum can also be used to create smoother textures in sauces and foams. Available in most supermarkets.
This core kit is a great foundation for your molecular gastronomy adventures. As you gain confidence, you can explore other ingredients like carrageenan, gellan gum, and maltodextrin.
Mastering the Fundamentals: Simple Techniques for Amazing Results
Now that we’ve gathered our tools and ingredients, let’s explore fundamental techniques. These techniques are building blocks for creating incredible culinary experiences.
- Spherification: This transforms liquids into small, flavorful spheres, like bursts of fruity goodness or savory juice pearls. The process involves dropping a liquid with sodium alginate into a calcium chloride bath. The calcium reacts, forming a gel-like sphere. There are many helpful videos online demonstrating both basic and reverse spherification.
- Foaming: This creates light and airy textures, transforming ingredients into clouds of flavor. Use an immersion blender and lecithin to create stable foams, from cheese foam to chocolate clouds. Lecithin stabilizes the foam by reducing surface tension, allowing air bubbles to form more easily and hold their shape.
- Gelification: This creates gels and jellies, playing with textures by using agar-agar. Adjusting the amount and cooking time controls the gel’s firmness for both sweet and savory dishes. Agar-agar gels are heat-resistant, meaning they won’t melt at room temperature like gelatin.
- Emulsification: This combines ingredients that don’t normally mix, like oil and water; lecithin is your key. It creates smooth, stable mixtures like mayonnaise or flavorful sauces. Emulsification also relies on physical agitation (like whisking or blending) to initially disperse the oil and water.
Beginner-Friendly Recipes: Your First Molecular Gastronomy Experiments
Ready to cook? These recipes use simple ingredients and techniques to introduce you to the wonders of molecular gastronomy. Follow instructions carefully—precision ensures fantastic results.
Recipe 1: Citrus Spheres (Basic Spherification)
Ingredients:
- 1 cup orange or grapefruit juice (freshly squeezed is best)
- 2 grams sodium alginate
- 4 cups calcium chloride bath (20g calcium chloride dissolved in 4 cups of water)
Instructions:
- Carefully whisk the sodium alginate into the citrus juice, ensuring no lumps remain. An immersion blender can help with this. Let the mixture rest for at least 30 minutes (or even overnight in the refrigerator) for the alginate to hydrate fully and any bubbles to dissipate. This step is crucial for clear, round spheres.
- Prepare your calcium chloride bath by dissolving 20 grams of calcium chloride in 4 cups of water. Stir until completely dissolved.
- Using a syringe or a teaspoon, gently drop small amounts of the citrus mixture into the calcium chloride bath. Avoid dropping them too close together to prevent them from sticking.
- Allow the spheres to sit in the bath for 2-3 minutes. They will gradually firm up. Adjust the time for a firmer or softer outer layer.
- Carefully remove the spheres with a slotted spoon and rinse them gently under cool running water to remove any excess calcium chloride.
- Serve immediately. These spheres offer a delightful burst of citrus flavor and a fun, unique texture. They can be added to cocktails, salads, or desserts.
Recipe 2: Simple Basil Foam (Basic Foaming)
Ingredients:
- 1 cup fresh basil leaves, firmly packed
- 1/4 cup heavy cream (or milk for a lighter foam, or coconut milk for a vegan option)
- 1 tablespoon soy lecithin
- Salt and pepper to taste
Instructions:
- Combine the basil, cream (or milk), and lecithin in a blender.
- Blend on high speed for about 2 minutes until the mixture is light and airy and has a fluffy consistency. An immersion blender works well for this.
- Season with salt and pepper to taste.
- Serve immediately as a garnish or alongside your favorite dish. This foam adds a delightful herbal note and interesting texture. Try it on tomato soup, grilled vegetables, or even as a topping for a Caprese salad.
Troubleshooting and Tips: Navigating Common Molecular Gastronomy Challenges
Even experienced cooks encounter hiccups; the key is to learn from your mistakes and not be discouraged. Here are some common problems and their solutions:
| Problem | Potential Causes | Solutions |
|---|---|---|
| Lumpy Spheres | Incompletely dissolved sodium alginate; air bubbles | Ensure thorough mixing using an immersion blender; let the mixture rest to remove air bubbles, or refrigerate overnight. |
| Weak or Unstable Foams | Insufficient lecithin; incorrect blending technique | Use higher quality lecithin; ensure it’s fully dissolved. Blend vigorously in short bursts to incorporate air. Avoid over-blending, which can collapse the foam. |
| Inconsistent Gel Texture | Inaccurate measurements; uneven heating of agar-agar | Use a scale for precise measurements; ensure agar-agar is properly dissolved by bringing it to a simmer while stirring constantly. Allow the gel to set fully in the refrigerator. |
| Bitter-tasting Spheres | Using too much alginate; insufficient rinsing | Reduce alginate quantity slightly. Rinse the spheres thoroughly after removing them from the calcium chloride bath. |
| Spheres sticking together | Dropping spheres too close together; calcium chloride bath too concentrated | Drop spheres further apart. Slightly dilute the calcium chloride bath. |
Further Explorations in Molecular Gastronomy
These recipes are just the start. The possibilities are endless. Experiment with different fruits, vegetables, and savory flavors. Don’t be afraid to try new things, adjust recipes to your liking, and discover your own unique creations. Explore online resources, join culinary communities – there’s a whole world of molecular gastronomy waiting to be discovered. Embrace the exploration, enjoy the process, and have fun transforming your kitchen into a culinary laboratory.
How to Spherify Without a Spherification Kit at Home
Ever wondered how those amazing caviar-like spheres appear in high-end restaurants? That’s spherification, a molecular gastronomy technique that transforms liquids into delicate, flavorful spheres. While special kits exist, you can absolutely master how to spherify without a spherification kit at home using common kitchen tools and readily available ingredients. Let’s explore this accessible culinary innovation.
Key Takeaways:
- Spherification, creating liquid-filled gel spheres, is achievable at home without specialized kits.
- Two main methods exist: direct and reverse spherification, each with advantages and drawbacks.
- Agar-agar offers a simpler alternative for creating solid spheres.
- Understanding basic principles of sodium alginate and calcium interactions is key.
- Experimentation and practice improve your spherification skills.
Understanding the Magic of Spherification
Spherification hinges on the reaction between sodium alginate, derived from brown seaweed, and a calcium source, typically calcium chloride or calcium lactate. When these two substances meet, a gel-like membrane forms, encapsulating the liquid within. This allows you to create tiny spheres that burst with flavor in your mouth. The size, texture, and flavor of the spheres can be modified by varying the concentration of the alginate and calcium, and the type of liquid used.
Essential Tools and Ingredients: Your Home Molecular Gastronomy Lab
You don’t need fancy equipment. For basic spherification:
- Immersion blender (for smooth mixtures)
- Small bowls and spoons
- Syringe or spoon for precise liquid dispensing
- Fine-mesh sieve (to remove clumps)
- Large bowl or container
- Slotted spoon
The key ingredients are:
- Sodium alginate (a seaweed-derived gelling agent): This reacts with calcium to form the gel membrane.
- Calcium chloride or calcium lactate: This “bath” triggers the gelling process. Calcium lactate provides a less bitter flavor than calcium chloride.
- Sodium citrate (optional but helpful): This helps prevent issues with acidic liquids.
- Your chosen liquid (juice, broth, puree etc.): This will form the center of your spheres. Ensure it is free of particulate matter to prevent clumping.
- Distilled water: For best results, use distilled water, as tap water can contain minerals that interfere with the spherification process.
Direct Spherification: The Quick and Easy Method
This method involves dropping your alginate-infused liquid into a calcium bath.
- Prepare your liquid mixture: Combine your liquid with sodium alginate (follow specific ratios in your recipe – experimentation is key!). A typical ratio is 1-2% sodium alginate to the liquid. Blend thoroughly using an immersion blender to avoid lumps. Let it rest for a few minutes to allow the alginate to fully hydrate. This step is important to prevent grainy spheres.
- Create your calcium bath: Dissolve calcium chloride or calcium lactate in water. A typical concentration is 0.5-1% calcium chloride or 1-2% calcium lactate.
- Spherify: Gently drop small amounts of the alginate mixture into the calcium bath. A syringe or a small measuring spoon works well. Let them sit for a few minutes (usually 1-3 minutes) until they form a gel-like skin. The longer they sit, the thicker the skin will be.
- Rinse: Gently remove the spheres with a slotted spoon and gently rinse them with fresh water to halt the gelling reaction. This removes excess calcium and prevents any further hardening.
Pros: Easier, faster, requires less equipment, good for beginners.
Cons: Shorter shelf life, spheres continue to gel from the outside in, more fragile spheres, not ideal for acidic or high-calcium liquids.
Reverse Spherification: For Stronger, Longer-Lasting Spheres
Reverse spherification flips the process. You infuse the calcium into your chosen liquid, then drop it into the alginate bath. This technique is particularly useful for liquids that are high in calcium or acidity, as it prevents premature gelling. The result is spheres which are very liquid inside, thus the “burst” sensation is higher.
- Prepare your calcium solution: Dissolve calcium lactate into your liquid being carefull not to introduce air. A typical concentration is 1-2% calcium lactate.
- Prepare the alginate bath: Dissolve sodium alginate in water. Again, precise ratios from reliable recipes are crucial. A typical concentration is 0.5-1%.
- Spherify: Drop your calcium-infused liquid into the alginate bath. This process creates a firmer gel than direct spherification.
- Gently remove and rinse: After several minutes, remove carefully and rinse.
Pros: Stronger, longer-lasting, can be stored better, works well with acidic and high-calcium liquids, creates spheres with very thin membranes and very liquid insides.
Cons: More complex, requires careful timing and precise ingredient measurements, requires de-aerating calcium solution.
Agar-Agar: An Easier Alternative
For a simpler spherification, try agar-agar. This gelling agent creates solid spheres, eliminating the need for a calcium bath. Simply mix it with your liquid, heat to dissolve, then use a syringe or spoon to shape the mixture directly into a bowl or onto a sheet of parchment. Let it cool and set. This technique will provide solid, gelatinous spheres, more similar to jellies, that do not burst.
Pros: Easier, predictable results, creates solid spheres, requires no calcium bath, vegan.
Cons: Doesn’t produce hollow spheres with a liquid core.
Troubleshooting Tips for Spherical Success
- Clumpy spheres: Ensure your liquids are thoroughly blended. Strain your alginate mixture through a fine-mesh sieve to remove any undissolved particles.
- Weak spheres: Check your ingredient ratios to ensure you have correct proportions. Use distilled water for best results.
- Spheres too firm or too soft: Adjust the concentration of your alginate or calcium solution. The higher the concentration, the firmer the spheres will be.
- Acidic liquids: Use sodium citrate to prevent the calcium from reacting too quickly with the acids present, which could cause the spheres to become misshapen. Adding too much acid can prevent spherification. Start with small amounts and increase as needed.
Molecular Gastronomy Techniques for Small Kitchen Spaces
Even with limited counter space, anyone can explore the world of molecular gastronomy.
Key Takeaways:
- Molecular gastronomy techniques, once exclusive to high-end restaurants, are now accessible to home cooks.
- Basic techniques require minimal specialized equipment.
- Mastering fundamental techniques like spherification and foaming opens a world of culinary creativity.
- Careful attention to ingredient ratios and precise measurements yields consistent, delicious results.
- Start with simple recipes, gradually progressing to more advanced techniques.
Essential Tools & Ingredients: Your Mini Molecular Gastronomy Lab
You don’t need a sprawling kitchen. An immersion blender is powerful and compact, perfect for almost any kitchen. A saucepan for gentle heating, a few bowls, and measuring spoons and cups are all you really need to begin.
What about ingredients? Agar-agar, sodium alginate, and lecithin are your new friends. These hydrocolloids can be found online or at specialty food stores, and they’re the key to transforming textures. Store these ingredients properly in airtight containers in a cool, dry place to extend their shelf life and prevent clumping.
Mastering the Fundamentals: Spherification & Foaming
Spherification is simpler than it sounds: You add sodium alginate to your liquid, then carefully drop it into a calcium chloride bath. The alginate reacts with the calcium, forming a gel-like sphere. Start with smaller batches to help fine tune recipes.
Then there’s foaming, where you transform liquids into airy clouds of flavor. With a little lecithin and an immersion blender, you can whip up foams from savory broths to sweet desserts. Lecithin acts as a stabilizer, allowing air bubbles to form and maintain their structure.
Beginner-Friendly Recipes: Small-Space, Big Flavor
Here are two simple recipes to start your molecular gastronomy journey:
Recipe 1: Mango Spheres (Direct Spherification)
- Blend ripe mangoes until smooth. Strain it so there are no lumps.
- Mix in sodium alginate (follow package directions for ratio). Typically, 1-2% sodium alginate is used. Use an immersion blender to ensure smooth incorporation.
- Let sit for a few minutes to hydrate but not clump.
- Prepare a calcium chloride bath (follow package directions). A 0.5-1% solution is commonly used.
- Use a syringe or spoon to carefully drop the mango mixture into the bath.
- Let the spheres rest for a few minutes, 1-3 minutes
- Rinse gently. Enjoy!
Recipe 2: Basil Foam
- Blend fresh basil with a little water and a pinch of lecithin.
- Use an immersion blender to create a thick, airy foam. Blend on high speed, incorporating air into the mixture.
- Serve atop soup, pasta, or even dessert.
Advanced Techniques (Optional): Taking it Further
Once you’ve mastered the basics, you can explore more advanced techniques like reverse spherification (the opposite of the previous technique) and the use of a whipping siphon. Remember safety first; always follow instructions carefully, especially when using tools or ingredients that have potential hazards. Clean your equipment thoroughly after use to maintain its integrity and prevent contamination.
Troubleshooting & Tips for Success
Molecular gastronomy is about precision. Accurate measurements are key—use a scale for best results! Temperature control is also crucial. Don’t rush the process; patience and attention to detail will pay off in delicious results. Take notes! Record your ingredient ratios, cooking times, and any adjustments you make to the recipes. This will help you replicate successful results and avoid repeating mistakes.
Advanced Molecular Gastronomy: Applications in Vegan Cooking
Vegan cooking is constantly evolving. Advanced techniques dramatically expand the possibilities for creating innovative and exciting vegan dishes. Molecular gastronomy embraces experimentation and creativity, so don’t be afraid to push boundaries and develop new flavor and texture combinations.
Key Takeaways:
- Advanced Molecular Gastronomy techniques dramatically expand the possibilities for creating innovative and exciting vegan dishes.
- Understanding basic principles like spherification, emulsification, and gelification unlocks a world of textural possibilities.
- Readily available tools and ingredients make Advanced Molecular Gastronomy accessible to home cooks.
- Careful ingredient selection is crucial for successful vegan adaptations.
- Safety precautions are essential, particularly when using equipment like liquid nitrogen.
Essential Tools and Ingredients for Vegan Molecular Gastronomy
Start with the basics: your kitchen will do. An immersion blender is your new best friend, and agar-agar, a seaweed-derived gelling agent, is a vegan superstar. You’ll also need sodium alginate, another key ingredient for spheres, and for more advanced techniques, consider a siphon or even liquid nitrogen (with proper safety training!). Explore vegan alternatives to traditional ingredients. For example, use aquafaba (chickpea brine) instead of egg whites for foams and meringues.
Mastering Basic Techniques: Spherification, Foaming, and Gelification
Spherification creates caviar-like spheres, tiny pockets of flavor bursting in your mouth! We’ll use sodium alginate and calcium chloride, while foaming creates airy textures, like light-as-air vegan mousse! Gelification turns liquids into gels, perfect for creative vegan puddings and jams. Different vegan gelling agents offer varying textures and setting properties. Experiment with agar-agar, carrageenan, and gellan gum to achieve desired results.
Beginner-Friendly Vegan Molecular Gastronomy Recipes
Here are two simple recipes to get you started.
Recipe 1: Vegan Mango Spheres (Reverse Spherification)
- Blend ripe mangoes until smooth. Strain it so there are no lumps.
- Mix a small amount of mango puree with calcium lactate/chloride, de-aerate solution.
- Separately, prepare a sodium alginate bath.
- Carefully drop the mango mixture into the alginate bath.
- Wait a few minutes for the spheres to form.
- Rinse and serve!
Recipe 2: Basil-Infused Vegan Foam (Using Aquafaba)
- Chill aquafaba (chickpea brine) in the refrigerator for at least 30 minutes.
- In a saucepan, heat basil leaves with a small amount of water to infuse the flavor.
- Strain the basil-infused water and let it cool
- Combine a bit of basil infusion with chilled Aquafaba.
- Whip the mixture to incorporate air. Use a hand mixer or stand mixer.
- Serve chilled as a refreshing topping or side dish.
Intermediate Techniques: Expanding Your Culinary Horizons
Once you’ve mastered the basics, explore techniques like sous vide cooking for precise temperature control, or using transglutaminase (vegan version) to bind ingredients. Always prioritize safety and remember that practice makes perfect. For an added layer of flavor, consider using a smoking gun to infuse your vegan creations with smoky notes.
Troubleshooting Tips
- Spheres not forming? Ensure the right sodium alginate/calcium chloride ratio. Adjust the ratio based on the acidity and calcium content of your liquid.
- Mousse too dense? Over-whipping can happen; gently incorporate air. Avoid over-mixing. Use chilled ingredients and equipment for best results.
- Gel too firm/soft? Adjust the agar-agar (or other gelling agent) quantity. Experiment with different concentrations to find the perfect texture.
This is just the beginning of your journey into the exciting world of Advanced Molecular Gastronomy: Applications in Vegan Cooking. Don’t be afraid to experiment, and remember that failure is just a stepping stone to success. Embrace the challenge and enjoy the process of creating innovative and delicious vegan dishes.
