Want to add incredible smoky flavor to your food without overcooking it? Cold smoking is your answer! This guide will show you how to do it safely and easily, whether you’re a complete beginner or already have some experience. We’ll cover everything you need to know, from setting up your smoker and picking the right wood, to curing your food and making sure it’s perfectly safe to eat. We’ll even share some tips and tricks to help you avoid common mistakes and achieve truly amazing results. Get ready to impress your friends and family with delicious, professionally-smoked meats, fish, and cheeses!
Cold Smoked Food Safely: An Expert Guide
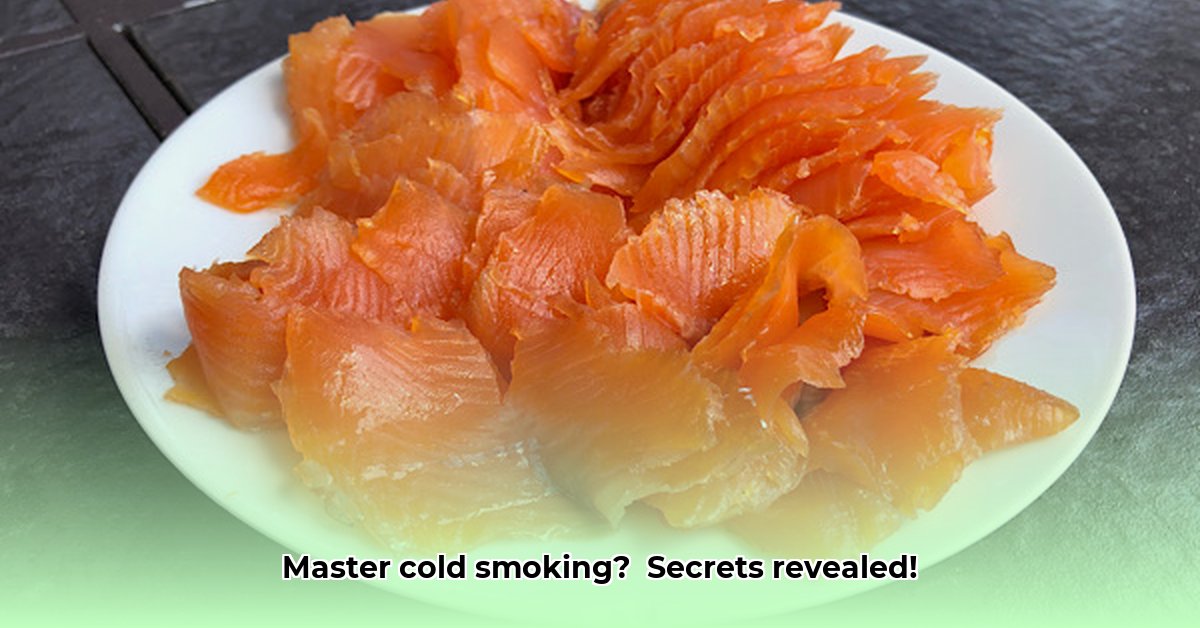
Cold smoking—it sounds fancy, and it can create amazing flavors, turning everyday foods into culinary masterpieces. It’s a method that infuses food with smoky flavor at temperatures that don’t cook the food. The key is maintaining a low temperature, typically below 85°F (29°C). This process is ideal for foods like salmon, cheese, and certain meats. However, it’s not without its challenges.
Let’s be clear: it’s not a walk in the park. This isn’t like grilling where high heat quickly cooks and sterilizes your food. Cold smoking happens at low temperatures, perfect for infusing smoky goodness, but also perfect conditions for nasty bacteria like Listeria and Clostridium botulinum (the botulism culprit) to multiply. Think of it this way: hot smoking is like baking a cake; cold smoking is more like carefully aging cheese – it needs precise conditions and careful attention. Mastering cold smoking involves understanding food safety, choosing the right equipment, and following precise techniques.
Safety First: Prioritizing Food Safety and Preventing Foodborne Illness
Before we even talk about the romantic allure of smoky flavors, let’s tackle the elephant in the room: food safety. Cold smoking requires the utmost care to avoid foodborne illness. Unlike hot smoking, which uses high temperatures to kill off harmful bacteria, cold smoking keeps things cool, which is a breeding ground for trouble. So, how do you make sure your delicious creation doesn’t also land you in the hospital? The answer is preparation.
The most important step? Proper curing or brining. This process uses salt (and sometimes sugar and nitrates) to draw out moisture and prevent bacteria from growing. It’s like creating a hostile environment for unwelcome guests. Think of it as a food-preservation superpower. Different foods – meats, fish, cheeses – often need different curing or brining times and concentrations. You’ll find more details on this below, but remember: when in doubt, err on the side of caution. Long, slow curing equals safer cold-smoked food.
Here are some crucial food safety practices to keep in mind:
- Use fresh, high-quality ingredients: Start with the best possible ingredients to minimize the risk of contamination.
- Maintain a clean workspace: Thoroughly sanitize all surfaces and utensils before and after handling food.
- Monitor temperatures closely: Use a reliable thermometer to ensure your smoker stays below 85°F (29°C).
- Follow proper curing and brining procedures: This is the most critical step in preventing bacterial growth.
- Cool and store food properly: Rapidly cool smoked food and store it at temperatures below 40°F (4°C).
Must-Have Gear for Your Cold Smoking Adventure: Choosing the Right Equipment
Let’s talk equipment. You’ll need a few key things before you start. First, a cold smoker. You’ll want something that can maintain a consistently low temperature, ideally below 80°F (27°C). Many dedicated cold smokers exist, but you might even be able to adapt an existing smoker or even build your own with some ingenuity. The choice is yours. A dedicated cold smoker setup usually involves two separate chambers: one for the smoke source and one for the food. This allows for better temperature control.
Also essential is a reliable digital thermometer. This isn’t something you want to skimp on; it’s your constant companion, monitoring the temperature and ensuring your food stays safe. We are aiming for accuracy; even slight temperature fluctuations can be a recipe for disaster. Look for a thermometer with remote monitoring capabilities so you can track the temperature without opening the smoker.
Next up: wood. Wood pellets are generally easier to work with than wood chips. They provide a more consistent and even smoke. The type of wood you choose influences the flavor profile substantially. Experiment! Fruitwoods like apple or cherry tend to produce sweeter, gentler smoke, while hickory or mesquite create bolder, more robust flavors. Avoid using softwoods like pine, as they contain resins that can impart an unpleasant flavor.
Here’s a list of recommended equipment:
- Cold smoker: A dedicated cold smoker or a modified smoker with temperature control.
- Digital thermometer: A reliable thermometer with remote monitoring capabilities.
- Wood pellets: Choose your favorite flavor, such as apple, cherry, hickory, or mesquite.
- Curing containers: Non-reactive containers for curing or brining food.
- Workspace: A clean and organized area for preparing and smoking food.
Finally, you’ll need a dedicated workspace. Cold smoking takes time, and there is no room for rush or clutter. Ensure adequate ventilation in your workspace, especially if you’re using an indoor smoker.
Curing and Brining: Preparing Your Food for Cold Smoking- A Step-by-Step Guide
Before you even light your smoker, your ingredients require a little pampering. Curing and brining are more than just culinary steps; they are your primary defense against bacteria. These processes use salt, sugar, and sometimes nitrates or nitrites to inhibit the growth of microorganisms. The exact method and duration depend entirely on your chosen food. Meat, for instance, often demands a considerably longer curing period compared to fish.
Dry curing involves rubbing a mixture of salt, sugar, and spices directly onto the food. Wet brining involves immersing the food in a solution of salt, sugar, and water. The choice between dry curing and wet brining depends on the type of food and your personal preference.
Here’s a basic guideline, but always research specific requirements for your chosen ingredient:
| Food Type | Curing/Brining Method | Minimum Time | Important Notes |
|---|---|---|---|
| Meats (Beef, Pork, Salmon, etc.) | Dry Cure (salt, sugar, optional nitrates) | Several days to weeks | Depends on the meat type, cut thickness, and desired results. Use curing salts (nitrates/nitrites) for longer cures and to prevent botulism. |
| Fish | Brine (salt, sugar, water) | 12-24 hours | Consider a wet brine for fatty fish; dry brine for leaner fish. Add herbs and spices to the brine for enhanced flavor. |
| Cheese | Dry Brine (salt rub) | Variable | Time depends on the cheese type and size. Hard cheeses require less time than soft cheeses. |
| Vegetables | Brine (salt, sugar, vinegar, water) | 2-12 hours | Use a weaker brine than for meats and fish. Add spices like peppercorns, bay leaves, and garlic for extra flavor. |
| Eggs | Brine (salt, sugar, soy sauce, water) | 2-4 hours | Use hard-boiled eggs. Gently crack the shells to allow the brine to penetrate. |
Remember these are just starting points. The curing time will also vary drastically depending on the thickness of the meat or fish. A thicker cut will naturally need longer to cure. Always consult reliable sources for specific curing times and methods.
Here are some best practices for curing and brining:
- Use non-reactive containers: Avoid using metal containers, as they can react with the curing ingredients.
- Keep food submerged: Ensure food is fully submerged in the brine to ensure even curing.
- Refrigerate during curing: Keep food refrigerated at temperatures below 40°F (4°C) during the curing process.
- Rinse after curing: Rinse food thoroughly after curing to remove excess salt.
- Pat dry: Pat food dry before smoking to help the smoke adhere to the surface.
The Cold Smoking Process: A Step-by-Step Approach for the Best Flavor
Now for the fun part! Here’s how to cold smoke your food, step-by-step:
- Prepare your smoker: Make sure it’s clean and your chosen wood pellets are ready. Ensure the smoker is set up for indirect smoking, with the smoke source separated from the food chamber. Adjust the air vents to control the airflow. Adequate airflow is essential for even smoking.
- Preheat (or Pre-chill): Allow your smoker to reach and maintain the ideal temperature, typically below 85°F (29°C). This may take some time, particularly if you’re using an indirect heat source. Some smokers may require pre-chilling to maintain these low temperatures, especially in warm weather. Using ice packs in the food chamber can help.
- Add fuel and wood: Add your wood pellets to the designated area of your smoker,
- Unveiling the Enigma: Mansoureh Khojasteh Bagherzadeh’s Public Appearances & Private Life in Iran - July 18, 2025
- Unveiling the Mystery: Mansoureh Khojasteh Bagherzadeh’s Husband: A Rare Glimpse into a Private Life - July 18, 2025
- Unveiling Masoud Khamenei’s Mother: Power, Influence, and Iran’s Future - July 18, 2025


